 お悩みさん
お悩みさん仮想環境って何? どこが便利なの?
Pythonを利用する上で、知っておくべきことがあります。
それは仮想環境を使うことです。
そして、仮想環境の中でもPoetryを使うことをお勧めしています。
もしも、まだ使っていない方がいればぜひこの記事を参考にしてみてください。
- Pythonを始めたばかりの初心者の方
- Poetryを始めたい方
- 仮想環境とはなんぞや、という方
Pythonをやるなら使うべきPoetry
Poetryは、pythonを学ぶ人、pythonですでにプログラミングをバリバリ書いている人が、
絶対に使った方がいい仮想環境です。
と、ここまで読んで、「仮想環境って何だ?」
そう思う方にこそ、この記事を読んで欲しいと思っています。
仮想環境とは「シェアオフィス」
pythonを続けていれば、今後、venvやパッケージ、
という仮想環境に関連する言葉とも出くわすはずです。
すごい狭義の話になってしまいますが、
仮想環境とは、パソコンの中に「架空のパソコン」をつくることです。
シェアオフィスを想像していただくといいかもしれません。
シェアオフィスは、一つのオフィスの中に、複数のオフィスが同居していますよね。
まさしく、そのイメージで、一つのパソコンの中に、スペースをつくって、
架空の別パソコンとして同居させることです。
なぜ仮想環境が必要なのか
なぜ、そんな仮想環境をつくる必要があるのか。
これもシェアオフィスと同じで、仮想環境ごとに別の役割を持たせることができるからです。
一つのパソコンにあれも、これもと装備を付けて、あらゆる業務をお任せするよりも、環境を分けることで、トラブルが起こるのを回避することができます。
またシェアオフィスは移転が楽ですよね。
仮想環境もそれと同じく、別のパソコンで作業したいときや、誰かにデータを渡すときに、仮想感環境ごとデータをコピーしてしまえば、他のパソコンを一から設定することなく、プログラミングを実行することができます。
Poetryの中でPythonを実行しよう
前置きが長くなってしまいましたが、仮想環境をつくってみたい、そう思ってもらえたでしょうか。
ここで推奨する仮想環境がPoetryです。
慣れるまで戸惑うことはあるかもしれませんが、難しいことはほとんどありません。
パソコンの中に、シェアオフィス(Poetry)を作って、そのシェアオフィス上でPythonを働かせます。
だからPoetryを使うときは、パソコン上のPythonではなく、Poetry上のPythonを使うことになります。
Poetryを始めよう
Poetryを始めるには、まずはPoetryをインストールするところから、始めます。
もっとも分かりやすく書いている記事があるので紹介しておきます。
以下のコマンドでPythonをインストールします。
curl -sSL https://raw.githubusercontent.com/sdispater/poetry/master/get-poetry.py | python下記のようなメッセージが返ってきました。
Retrieving Poetry metadata

This installer is deprecated. Poetry versions installed using this script will not be able to use 'self update' command to upgrade to 1.2.0a1 or later.
# Welcome to Poetry!

This will download and install the latest version of Poetry,
a dependency and package manager for Python.

It will add the `poetry` command to Poetry's bin directory, located at:

$HOME/.poetry/bin

This path will then be added to your `PATH` environment variable by
modifying the profile files located at:

$HOME/.profile
$HOME/.bash_profile

You can uninstall at any time by executing this script with the --uninstall option,
and these changes will be reverted.

Installing version: 1.1.11
  - Downloading poetry-1.1.11-darwin.tar.gz (48.95MB)

Poetry (1.1.11) is installed now. Great!

To get started you need Poetry's bin directory ($HOME/.poetry/bin) in your `PATH`
environment variable. Next time you log in this will be done
automatically.

To configure your current shell run `source $HOME/.poetry/env`
PoetryのPathを変更。
export PATH="$HOME/.poetry/bin:$PATH"これでPoetryが使えるようになるはずです。
実際に使ってみよう
Poetryの環境を作成
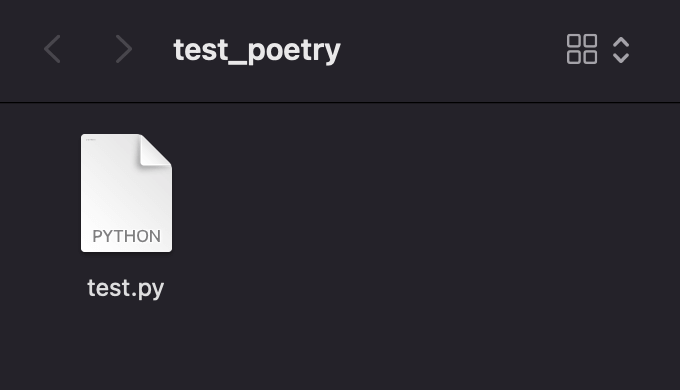
今回はデスクトップにtest_poetryというフォルダを作って実践してみます。


test.pyには以下の一文だけを記述をしています。
print('Hell0')test_poetryフォルダに移動します。
cd desktop/test_poetryまず初めに以下のコマンドでPoetryの環境を宣言します。
poetry initすると、以下のようなメッセージが出てきます。
エンターで先に進めていきましょう。
Authorは聞かれたら、None と答えて問題ありません。
This command will guide you through creating your pyproject.toml config.

Package name [test_poetry]:
Version [0.1.0]:
Description []:
Author [None, n to skip]:
expected string or bytes-like object
License []:
Compatible Python versions [^3.9]:

Would you like to define your main dependencies interactively? (yes/no) [yes]
You can specify a package in the following forms:
  - A single name (requests)
  - A name and a constraint (requests@^2.23.0)
  - A git url (git+https://github.com/python-poetry/poetry.git)
  - A git url with a revision (git+https://github.com/python-poetry/poetry.git#develop)
  - A file path (../my-package/my-package.whl)
  - A directory (../my-package/)
  - A url (https://example.com/packages/my-package-0.1.0.tar.gz)

Search for package to add (or leave blank to continue):

Would you like to define your development dependencies interactively? (yes/no) [yes]
Search for package to add (or leave blank to continue):

Generated file

[tool.poetry]
name = "test_poetry"
version = "0.1.0"
description = ""
authors = ["None"]

[tool.poetry.dependencies]
python = "^3.9"

[tool.poetry.dev-dependencies]

[build-system]
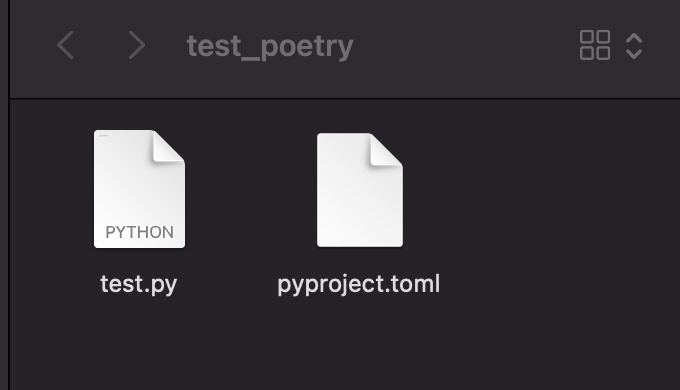
pyproject.toml というファイルができていたら成功です。


Poetry(Python)をフォルダにインストール
続いて、Poetryをフォルダ内にインストールします。
poetry installすると以下のメッセージが返ってきます。
Updating dependencies
Resolving dependencies... (0.1s)

Writing lock file
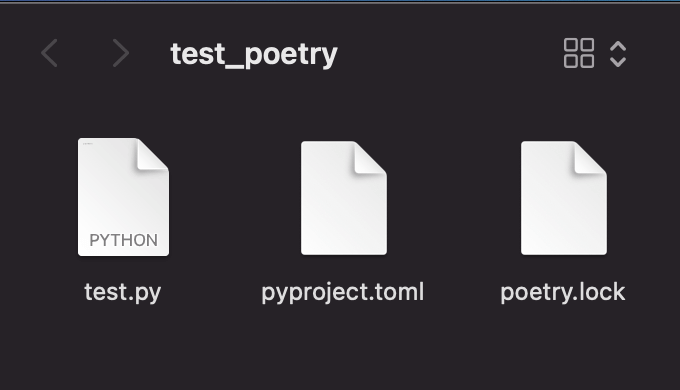
今回は、poetry.lockというファイルができていたら成功です。


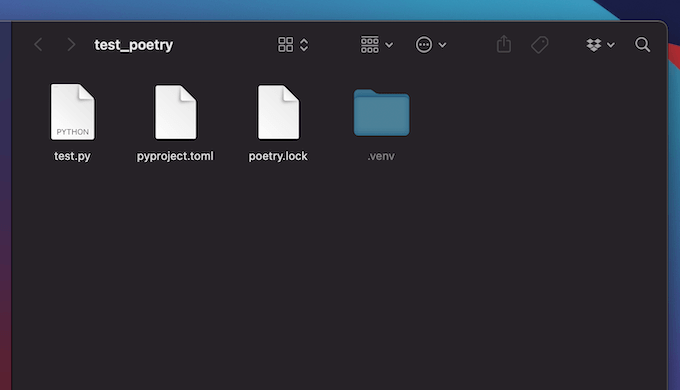
ここで、Command + Shift + 「.」を押してみてください。(Macの場合)


.venvという謎のフォルダが出てきました。
これぞ、Poetryの仮想環境(フォルダ)です。
windowsの非表示ファイルの表示方法は以下を参照してください。
つまりこのフォルダ(test_poetry)を一つのシェアオフィスとしてプログラミングができる環境をつくったわけです。
Pythonスクリプトの実行
では最後にPythonの実行をしてみます。
フォルダ内のtest.pyを実行します。
コマンドは以下です。
poetry run python test.pyちなみに、以下のコマンドを使った場合、
python test.pyPoetry(仮想環境)ではなく、PC本体のPythonを使うことになるので、ご注意ください。
では実際に、動かしてみます。
poetry run python test.py以下のメッセージが返ってきました。
Hello


無事にPythonをPoetryの環境で動かすことができました!
まとめ
仮想環境は、パソコンの中にシェアオフィスをつくること
だと考えると、理解しやすいと思います。
Pythonの仮想環境でおすすめはPoetryです。
なぜ仮想環境が必要なのか、そして実際にインストールしてみたけど、どうやって使うの?
そんな当時の僕の疑問に思っていたことを、まとめてみました。
初心者の方を中心に参考にしていただければ嬉しいです。

![【Poetry】[Errno 13] Permission deniedの解消法|Poetryが使えないとき](https://clione33.online/wp-content/uploads/2022/12/poetry-permission-denied-solution_01.png-300x158.webp)


コメント