 お悩みさん
お悩みさんPythonとスプレッドシートを連携したいー!
この記事では、Google Sheets APIを使って、
Pythonでスプレッドシートにアクセスする方法をお伝えしていきます。
APIを使うことができれば、Pythonでスプレッドシートの情報を取得したり、逆にPythonで出力したデータをシートに書き込んだりする作業が可能になります。
- Google Sheets APIの取得方法
- Pythonとスプレッドシートの連携方法
- スプレッドシートへのアクセス許可方法
環境
| OS | Mac 10.15.4 |
| Python | python 3.9 |
| 仮想環境 | Poetry |
| Homebrew | 8.0.19 Homebrew |
Google Cloud Platform のプロジェクト作成
今回は、Google API Platformでプロジェクトがある前提で、お伝えしていきます。
プロジェクト作成については、以下の記事の「プロジェクトの作成」の項目を参考にしてください。
スプレッドシートのAPIの取得
上記のURLから、Google Cloud Platformのライブラリに移行して、
スプレッドシートのアイコンを探します。(検索も可能です。)
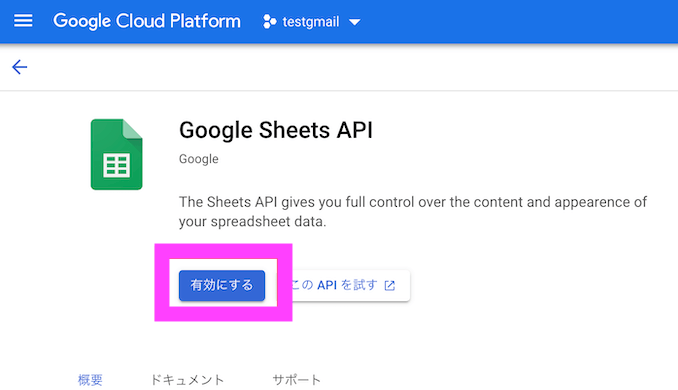
APIの有効化
スプレッドシートAPIのページを見つけたら、Google Sheets APIを有効にします。
プロジェクトの秘密鍵の発行
ここでダウンロードしたjsonファイルは非常に重要なので、決して外部に出さないように注意してください
プロジェクトのページから、左側の鍵マーク → キー → 鍵の追加を選択します。
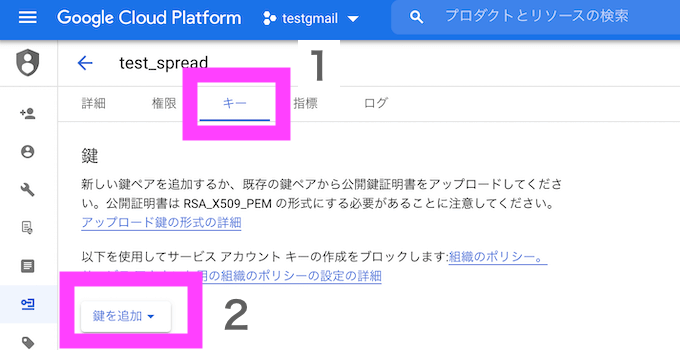
JSONを選択して、作成をします。
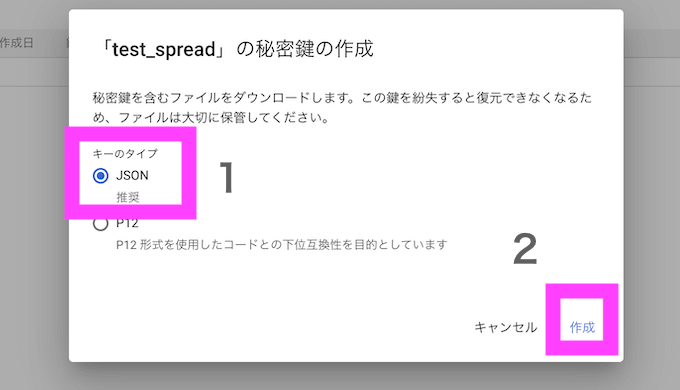
ダウンロードされるファイルは、次に説明する「プロジェクトのユーザー追加」で必要になります。
プロジェクトのユーザー追加
さきほどのJSONファイルをもとに、プロジェクトのユーザーを追加していきます。
先と同じ認証のページから、権限 → 新しいメンバー → サービスアカウント権限の選択 を設定します。
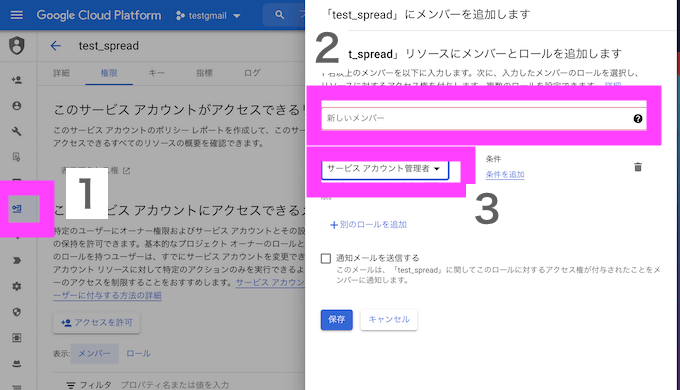
上記画像の2の「新しいメンバー」には、さきほどのjsonファイルに記載されているclient_emailの部分のアドレスを入力してください。
画像の3は「編集者」を選択しました。(スプレッドシートの権限と同じです)
メンバーの確認
作成をしたら、メンバーを確認します。
「ロール:オーナー」の下に、「ロール:編集者」の新しいメンバーが加わっているのを確認できました。
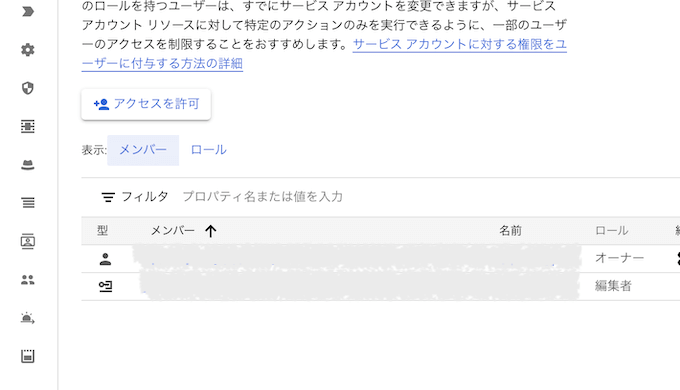
これでGoogle API Platformでの設定は完了です。
スプレッドシートの共有
ここで使った、client_emailのアドレスは、スプレッドシートの共有にも使います。
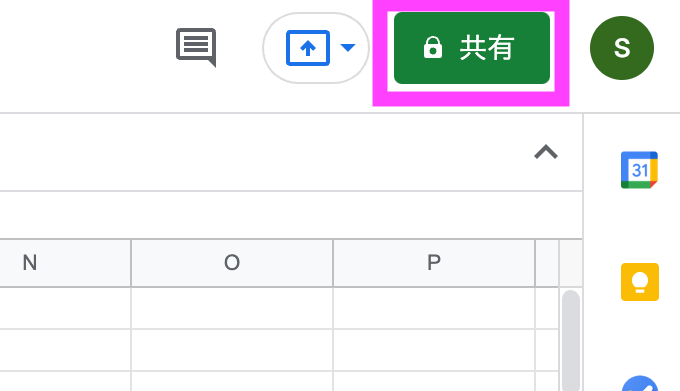
Pythonで連携したいスプレッドシートのページを開いて、右側の共有を選択します。
続いて、先ほどjsonファイルで取得したclient_emailのアドレスを入力して、完了を選択します。
xxxxxx@xxxxxxxxx.iam.gserviceaccount.com ←のようなアドレスです。
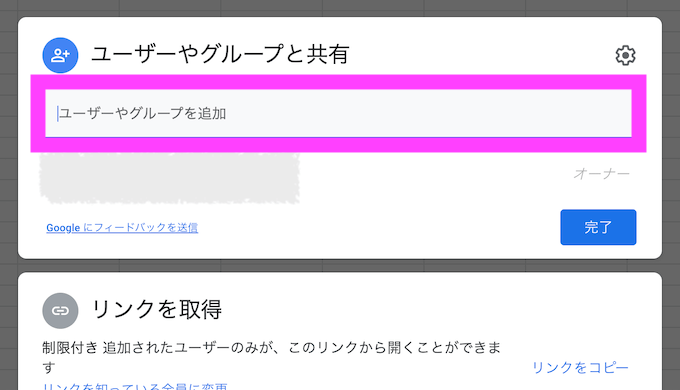
最後にユーザーに通知をするかが聞かれますが、通知をしてもどちらでも問題ありません。
jsonファイル設定と、ライブラリのインストール
Jsonファイルの設定
さきほど秘密鍵の発行でダウンロードしたjsonファイルを、client_secret.jsonというファイル名に変更しました。
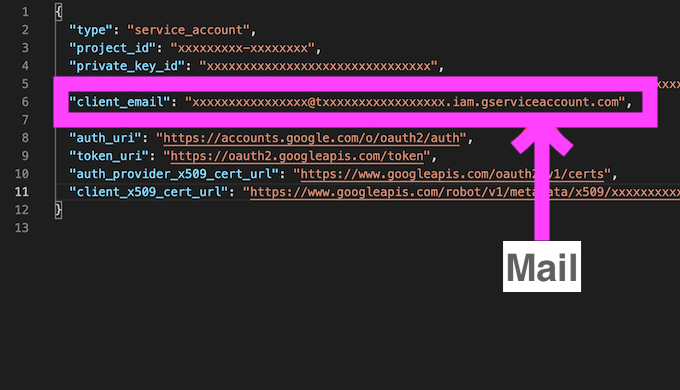
(jsonファイルの内容は以下のようになっています)
{
  "type": "service_account",
  "project_id": "xxxxxxxxx-xxxxxxxx",
  "private_key_id": "xxxxxxxxxxxxxxxxxxxxxxxxxxxxxxx",
  "private_key": "-----BEGIN PRIVATE KEY-----\nxxxxxxxxxxxxxxxx\nxxxxxxxxxxxxxx\nxxxxxxxxxxxxxx\n-----END PRIVATE KEY-----\n",
  "client_email": "xxxxxxxxxxxxxxxx@txxxxxxxxxxxxxxxxx.iam.gserviceaccount.com",
  "client_id": "xxxxxxxxxxxxxxxxxxxxxxxxxx",
  "auth_uri": "https://accounts.google.com/o/oauth2/auth",
  "token_uri": "https://oauth2.googleapis.com/token",
  "auth_provider_x509_cert_url": "https://www.googleapis.com/oauth2/v1/certs",
  "client_x509_cert_url": "https://www.googleapis.com/robot/v1/metadata/x509/xxxxxxxxxxxxxxxxxxxxxxxxxxx.iam.gserviceaccount.com"
}
ライブラリのダウンロード
Poetryを使っている方は、ここを飛ばして、Poetryの環境設定を確認してください。
gspreadと、oauth2clientのモジュールをPythonにインストールします。
pip install gspread --ignore-installed sixpip install --upgrade oauth2client --ignore-installed sixpoetryの環境設定
Poetryを使っていない方は上記で設定ができているので、飛ばしてください。
Poetryを使っている方は以下のコマンドでモジュールを追加してください。
poetry add gspreadpoetry add oauth2clientこれでPoetryの設定も完了です。
Pythonのスクリプト作成
Pythonで実行したいこと
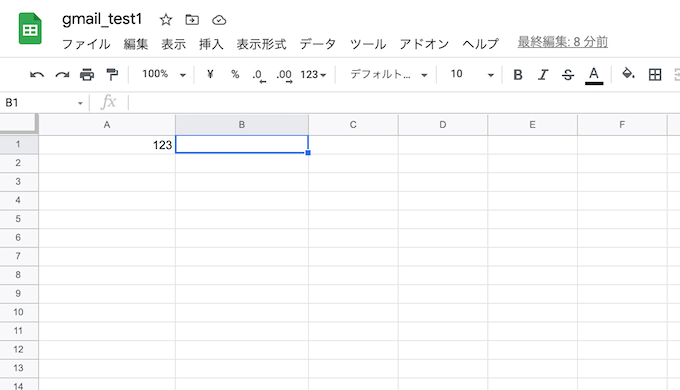
今回は、下記のスプレッドシートの「A1セル」の取得したいと思います。
つまり、123 を取得できればクリアです。
Pythonのスクリプト作成:スプレッドシートの連携
コードは以下のスクリプトを作成しました。
#spreadsheet2.py
import gspread
from oauth2client.service_account import ServiceAccountCredentials
from pprint import pprint


scope = ["https://spreadsheets.google.com/feeds","https://www.googleapis.com/auth/spreadsheets","https://www.googleapis.com/auth/drive"]
creds = ServiceAccountCredentials.from_json_keyfile_name('client_secret.json',scope)
client = gspread.authorize(creds)

sheet = client.open_by_key('xxxxxxxxxxxxxxxxxxxxxxxx').sheet1
result = sheet.cell(1,1).value
print(result)
上記でPythonにスプレッドシートをどう連携させているの?
まず以下の2行は、先ほどダウンロードしたjsonファイル(client_secret.json)を指定しています。
creds = ServiceAccountCredentials.from_json_keyfile_name('client_secret.json',scope)
client = gspread.authorize(creds)
スプレッドシートの指定はどう設定しているの?
スプレッドシートの指定は以下で行っています。
sheet = client.open_by_key('xxxxxxxxxxxxxxxxxxxxxxxx').sheet1スプレッドシートの指定方法はいくつかありますが、ここでは、Key を記載する方法を使っています。
keyはスプレッドシートのURL部分から得ることができます。
URLの、xxxxxxxxxxxxxxxxの部分です
https://docs.google.com/spreadsheets/d/xxxxxxxxxxxxxxxxxxxxxxxxx/edit#gid=0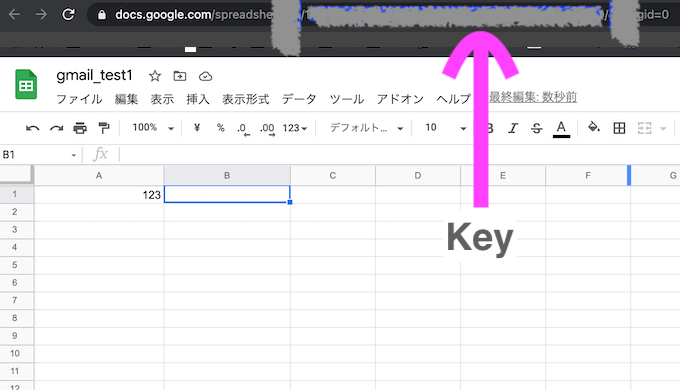
スプレッドシートの情報はどう取得しているの?
以下のコードで、resultという変数に、シートのA1セルの情報を入れています。
A1のセルは、(1,1)で選択をしました。
result = sheet.cell(1,1).value実行結果
123 クリワン
クリワンやった!A1セルの内容を取得することができた!
まとめ
Pythonでスプレッドシートを扱えるようになれば、スプレッドシートを使ったさまざま業務を自動化できる可能性があります。
僕自身も退屈だったGoogleアナリティクスの情報をなPythonを使って、
スプレッドシートに自動記入できるようにしましたが、
これが本当に便利で、プログラミングを勉強してよかったなと改めて実感しています。
参考
gspread Usageのページを記載しておきます。
スプレッドシートと連携する際に必要になるPythonの書き方が掲載されています。


コメント